Showing posts with label Paper Crafts. Show all posts

DIY Paper Flowers {without a die cutting machine}

DIY Paper Flowers {without a die cutting machine}

With Mother’s Day quickly approaching it’s time to start thinking about gifts and ideas for the special mother’s in your life. Today I’m going to show you how easy it is to make paper flowers without a die cutting machine. It’s no secret that I enjoy using my die cutting machines, but I still like using punches just as much as I used to! These flowers are made with a punch, layered to create an ombre effect, and finished with a button in the center. You can use the paper flowers in a bouquet, centerpiece for your Mother’s Day brunch, or to wear as a boutonniere.
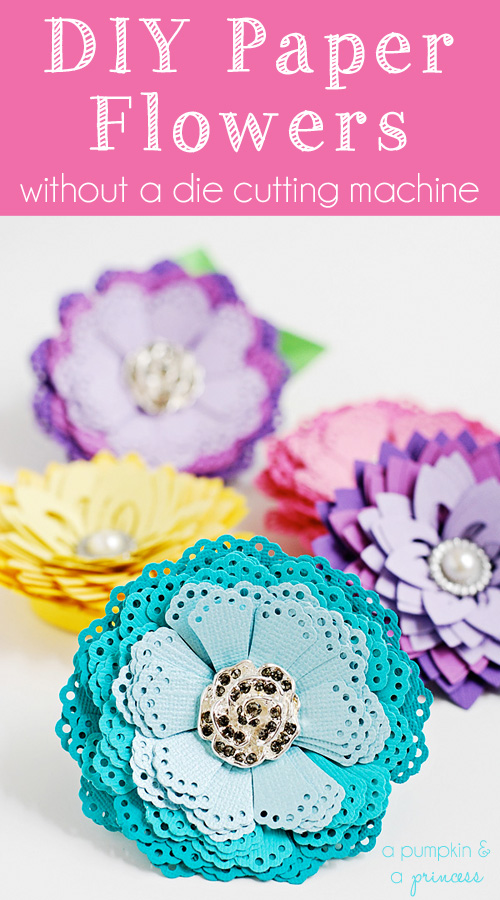
Easy paper flower tutorial 

 Link to read : http://apumpkinandaprincess.com/2013/04/diy-paper-flowers-without-a-die-cutting-machine.html
DIY paper flowers without a die cutting machine
paper
punches in various styles
button
tape runner
hot glue
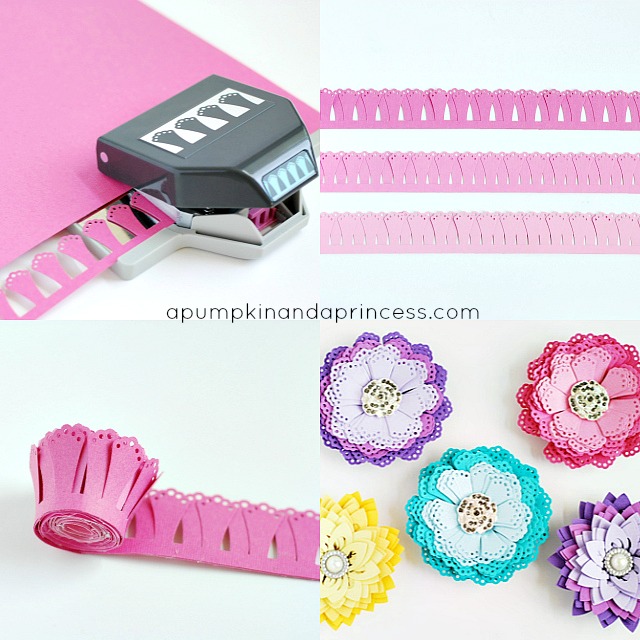
DIY Paper Flowers Tutorial
Step one: Punch two strips of paper for each color (each flower has six strips of paper total). The lighter the paper the easier it is to repeatedly punch, but unfortunately also makes a flimsier flower. I used heavy cardstock for my flowers.
Step two: Slightly overlap one strip on top of the other for each color. I used a tape runner to glue them together.
Step three: Using a low-temp hot glue gun glue the first strip in a circular pattern. Keep wrapping the paper around, gluing every couple of inches. Then repeat with the next two strips, starting where the previous strip ended.
Step four: Glue a button in the center, the more it sparkles the better. :)
Step five (optional): hand cut leaves and glue to the back of the flower. Glue a felt circle onto the flower and add a pin on top.


Tutorial of the trailer


Hello everyone,
after a few requests, here is the tutorial of the trailer circus Rémi :

List of basic supplies (excluding embellishments depending on your taste):


  • Very thick cardboard and rigid
  • A glue gun
  • A good pair of scissors
  • Paper (at least one printed sheet double-sided ) (by Chloe Closet of Making Memories )
  • Buttons,
  • Tape
  • Thread and needle
  • Flowers,
  • Two mini magnets,
  • A border punch (or scissors pinking failing)
  • Liquid Pearls (for finishing)
  • Sandpaper, file or other ...
  • A transparent drop of water, plastic (for bulb lantern at the door)
  • A little patience ...

I'm a little novice regarding the tutorials , so I tried to create files with the plans, you will find below. Clickon these pictures: "Open link in new tab", then "Save Image As ... ", you will have images in A4 format on your computer, and you can print and cut out the templates. For those who do not have a printer or wants to pass template, dimensions are indicated on the images (or text). So to begin, you'll need a little (lot) of stiff cardboard. For my part, I had received a lot where there were pieces of cardboard " book boards "7Gypsies , but any card can do the trick (provided it is thick!) The step of cutting different parts cardboard is quite painful, and the box will be thicker and stiffer, it will be a hassle, but the result will live up to your efforts lol Very good scissors needed, and I had just received scissors Fiskars 'Club Fiskarettes !


Turtle - quilling

Turtle - quilling-MK 

Source: http://homyachok-scrap-challenge.blogspot.com/2012/06/blog-post_05.html

All the good days! Introducing master class from our designer Svetlana Belova - charming bug in quilling technique.  rapid and affordable MC for those who loved this charming (not afraid of the word) creation ...!

Is simple, unpretentious ... Getting? Large circles on the shell of 7 pieces, each curl of as much as 4 bars any selected color (even gray-brown-flecked raspberry ...) I have this same shade of brown. Tied shaybochku, gently push in the middle of a missed inside and glue.


Small shaybochek 6 pcs. And they do just as big, just as much as two slips


Project Pretty: DIY Fabric Boxes & a Link Party!

Last week I got the itch.  Not a rash.  An itch to do something.  To DIY.  To project.  To organize.  To make something PRETTY!

And so
I challenged myself along with you, to do some organizing and beautifying.  How did ya'll do?

Source: http://iheartorganizing.blogspot.com/2012/03/pretty-pretty-diy-fabric-boxes-link.html

I am pretty gosh darn excited about the outcome of my project!

We have this fabulous piece of Craigslist furniture sitting in our playroom.  It's intention is to hold lots and lots of toys.

Nope, for this project I didn't paint it, but that is next on the list.  I actually tackled something that has been hiding behind those doors:

Yep, a pair of boxes.  Acting as toy and puzzle storage.  Aren't they purdy?

Not so much.


Here are some of the supplies  I used to spruce them up a bit:


  1. Fabric
  2. Craft Knife or Scissors
  3. Spray Adhesive
  4. Yard Stick
  5. Cotton Cord
  6. Grommets
  7. Empty Boxes
I have a bit of a color scheme going in the playroom which is green and turquoise, so to cover the boxes I stuck with fabric in those colors.